Using A360 Channel Manager
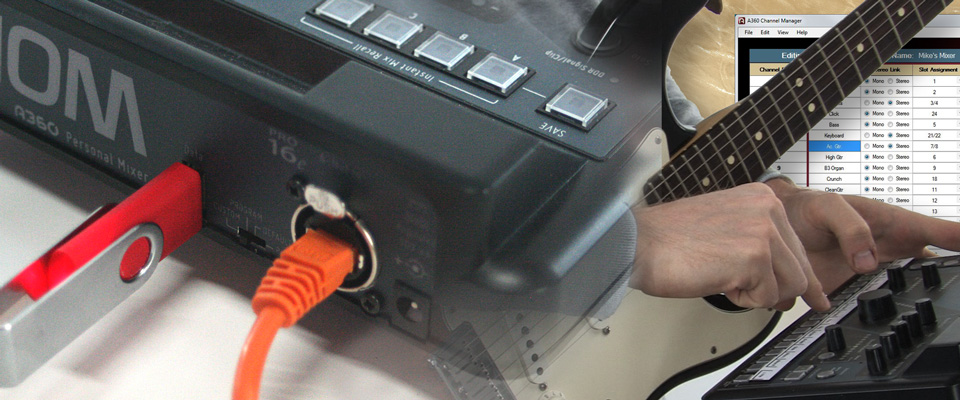
One of the coolest features of the A360 Personal Mixer has to be that each A360 can be individually programmed to have the exact channel layout that each performer needs. A Pro16e network can have up to 64 sources to choose from, and that offers a lot of flexibility. And that flexibility comes in really handy as the ensemble gets larger; every performer can have a customized channel layout that suits their individual needs.
A360 Channel Manager™ simplifies the setup of A360 Personal Mixers that will be used in Custom mode. Each A360 in your system can have a unique set of channels assigned to it simply by creating a custom configuration for each mixer. Mixer Configuration files are created on your PC and can be saved to a USB memory stick for loading into the A360 Personal Mixer.
Getting Organized
Most performing ensembles use a mixture of mono and stereo sources. A typical vocal mic is mono, as is a bass guitar or a kick drum. Keyboards and guitar effects frequently have a stereo output, and any submixes that the mix engineer creates can benefit from being stereo as well.
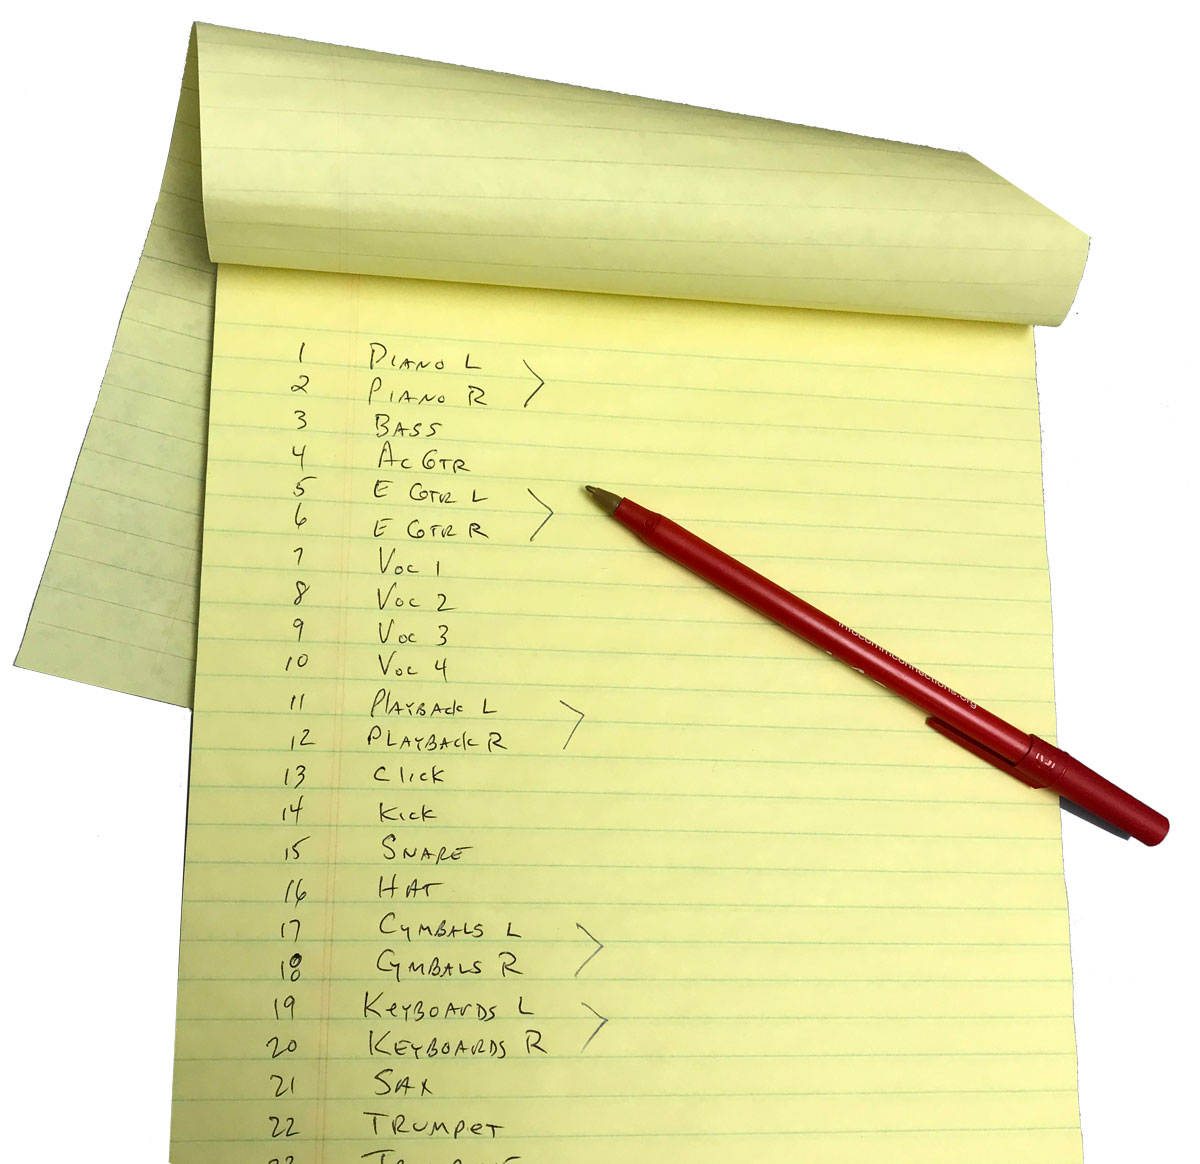
Take notes and make a channel input list that shows mono and stereo source channels.
Aviom’s A360 Personal Mixers can support using a blend of mono and stereo channels. Stereo links are set up at the input source (analog, console card, or Dante network) and then transmitted to all Personal Mixers in the network.
It’s important to map out your inputs before starting down the path of creating custom A360 channel layouts. You need to know which channels are mono and which channel pairs are set to stereo because the A360 Channel Manager software requires that you tell it whether each A360 channel button is stereo or mono.
To make that process easier to navigate, make a simple input channel list; use a spreadsheet program or go old-school with a pen and pad of paper. Mark the stereo pairs (and remember stereo pairs must be on odd-even input channels ).
Make it easy. Download and print our free Aviom Channel Layout worksheet.
Programming the Channel Buttons
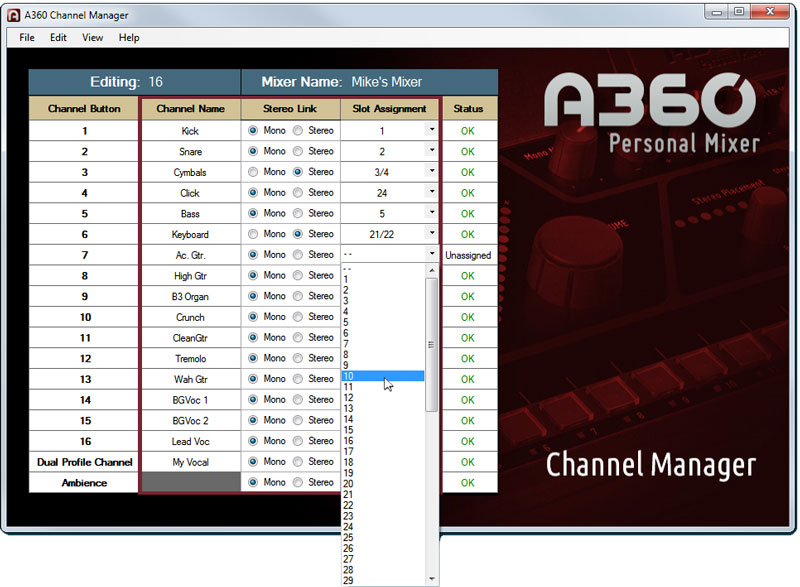
Each mix channel button on an A360 Personal Mixer (as well as the Dual Profile Channel and Ambience buttons, 18 in all) can be assigned either a mono or stereo source from the 64 Slots available in the Pro16e network. Each mix channel button on the A360 must be correctly set to either Mono or Stereo using the Stereo Link radio buttons. Of course, your input devices need to be set up properly for these stereo links to work on the A360. The Mono/Stereo buttons in the software do not set up the stereo links, the input devices do.
Mono or Stereo
To change a mono channel button’s assignment, click to open the drop-down menu associated with the channel and then choose the desired network slot from the list. In the screen shot above, we are editing channel button #7. We are in the process of selecting a mono source, #10, from the network.
The drop-down menu for stereo channels contains pairs of odd-even network slots 1/2 through 63/64, plus the double dash ‘‘‑ ‑‘‘ character used to indicate that a channel button is unassigned.
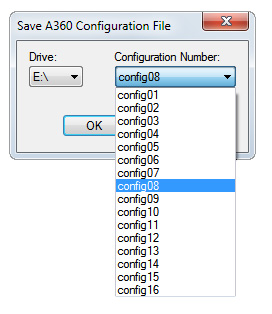
Choose a drive location and a configuration number to save your new file.
To change an assignment for a stereo mix channel button, click to open the drop-down menu associated with the channel and then choose the desired pair of network slots from the list. Again, the software assumes that you know which channels of your input sources are mono or stereo.
Save a Configuration
Use the Save… command (in the File menu) to store your new configuration to the storage device. A dialog box with drop-down menus allows you to select the storage device on your PC where configurations will be stored as well as which Configuration Number (1-16) to use. Each storage device can hold up to 16 unique configurations, more than enough for a typical ensemble.
Load a Mixer Configuration Into the A360
Once you’ve created your custom configuration, it needs to be loaded into the A360 Personal Mixer. Follow these steps:
1. Connect the USB memory device to the USB port on the rear of the A360 Personal Mixer.
2. Move the rear-panel switch on the A360 to the Program position; the Save and Recall LEDs will flash and the A360 mixing interface is temporarily disabled.
3. Press the Recall button.
4. The Save LED goes out and all 16 mix channel buttons begin to flash.
5. Press the numbered mix channel button that corresponds to the configuration on the USB device you wish to load.
6. The yellow Mute LEDs beneath the mix channel buttons light in sequence as a confirmation that the configuration has been loaded successfully.
7. Move the rear-panel switch on the A360 to the Custom position to use the new channel layout.
That’s it. Your custom configuration will remain in your A360 until you decide to change it. Of course, there’s more you can do with A360 Channel Manager, including saving mix presets from your Personal Mixers and editing existing configurations. For more information, refer to the A360 Channel Manager User Guide.
Get your very own copy of A360 Channel Manager from our website. It’s free.


