An Overview of Compression
Musical instruments, singing, dialog, sound effects, and background sounds all are capable of producing loud and soft passages in a mix. The difference between the loudest and softest sound levels is known as Dynamic Range. Altering the dynamic range with software or hardware changes the resulting overall level of the audio and makes the sounds in a mix more even. This is what’s known as compression. It can be both a good thing and a bad thing. It’s used on practically every type of audio that you encounter on a daily basis.
In a live or studio mix, compression on individual parts (singer, bass, guitar, etc.) helps smooth out the natural volume level variations that happen when people perform. Used sparingly, compression is hardly noticeable. It can be used to make a bass guitar sit at a consistent volume in a mix, or even out the performance variations between sections of a song when a vocalist sings.
Here’s an example of the effects/benefits of using compression. The waveform in the first example has its highest peak at about -1.5dB of full scale (indicated with the blue arrows). This means that if we try to raise the volume of this channel by as little as 2dB we will be above the 0dB (full scale) mark and start to clip the signal, resulting in distortion. The more we raise the level, the more the signal distorts.
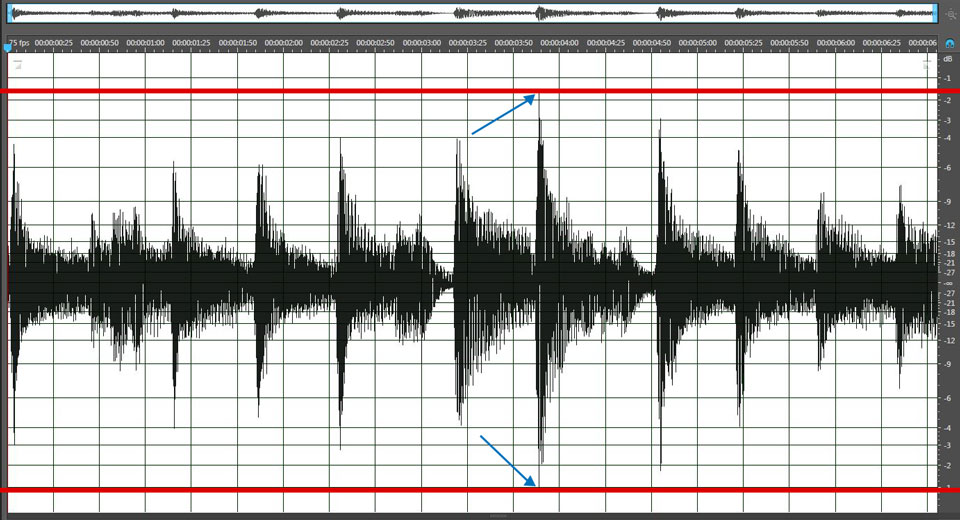
The red lines indicate the loudest levels reached in this short audio passage; the peaks are indicated with blue arrows.
By adding a bit of compression to this signal we can tame the peaks without damaging the surrounding audio. This is done by setting the compressor’s Threshold parameter to an appropriate point.
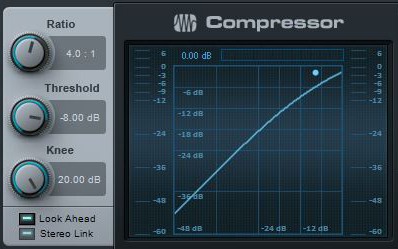
Ratio and Threshold settings on a typical compressor
The Threshold is the level at which the compressor starts to act on the audio; signals below this point pass through unaffected.
Threshold works hand-in-hand with the Ratio parameter which controls how much volume reduction happens once the audio signal crosses the Threshold. Typical ratios are from 2:1 to 10:1. The ratio setting means (using 4:1 as an example) that once the incoming audio crosses the threshold, the compressor will only let the audio increase by 1dB for every 4dB the audio actually increases. The lower the Threshold is set, the more pronounced the effect is.
The second example shows the audio from the previous example after being compressed. The high peaks near -1.5dB are now lowered and the audio itself even looks more smooth. The peak we had before now looks more similar to those around it. Now the channel can be raised by as much as 4dB without distorting.
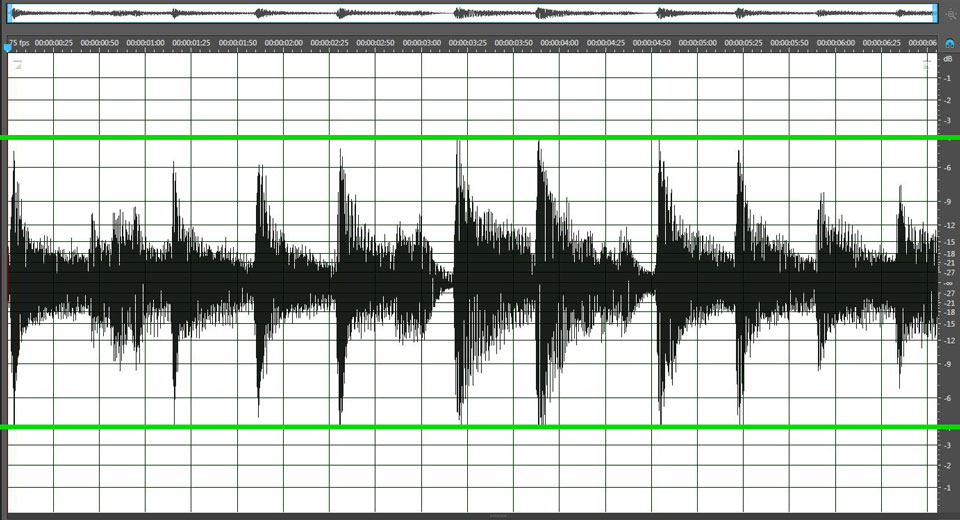
The green line shows the same audio from Example 1 after compression.
The last example shows the before and after peak indications over;aid upon each other. Once the audio has been compressed, it can be raised in level in the mix without clipping or distortion.
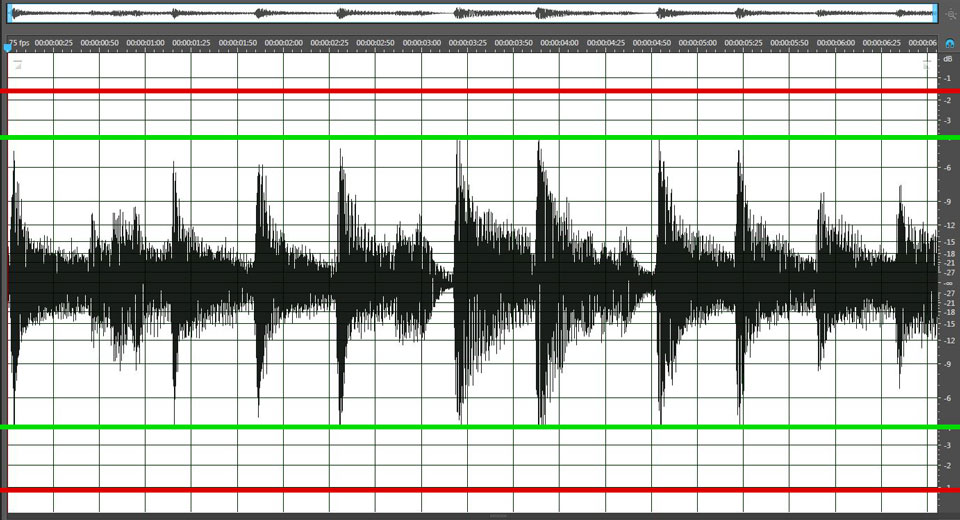
The red line shows where the original pre-compression peaks hit; the green line shows the audio after compression.
How much compression to use will depend on a number of factors including the audio source itself, the style of music, and whether the audio is a live performance or a recording session. It pays to spend time with the tools you have at your disposal and experiment until you understand how the different compressors and their associated settings react.


